How to enable hierarchical namespace on an Azure storage account
To enable a hierarchical namespace and unlock capabilities such as file and directory-level security on an Azure storage account, you need to upgrade your Azure Blob storage with Azure Data Lake Storage Gen2 capabilities. In this article, I’ll explain how to do this using PowerShell and Azure CLI. Important: It is a one-way upgrade. There is no way to revert the change once the process is complete. I recommend that you first validate the conversion in a non-production environment.
At the time of this writing, the following features are not supported. Therefore, they will need to be removed or disabled to perform the upgrade. #
Unsupported blob types
- Page blob
Unsupported data protection
- Container snapshot
- Container soft delete
- Point-in-time restore
Other unsupported capabilities
- Change feed
- Active leasing
- Blob tagging
- Container rename
- Customer-provided key (CPK)
- Encryption scope
Azure PowerShell Workaround #
Check out this link if you want to know how to install the PowerShell Azure module on your machine. The simplest way to get started is to sign in interactively at the command line.
Connect-AzAccount
This cmdlet will bring up a dialog box prompting you for your email address and password associated with your Azure account. You can choose the default subscription if you have more than one associated with your mail account. To perform this task, we will use the following commands:
Get-AzSubscription
Select-AzSubscription -Subscription "My Subscription"
Once you set your default subscription, you are ready to start.
Set the variables #
Here, we define the characteristics of our environment and the resource’s properties.
$resourceGroupName = "RG-DEMO-WE"
$stoAccountName = "storagedemowe"
Get the current setting in your storage account #
To get the current status of this feature on the storage account, you should use the Get-AzStorageAccount cmdlet with the following syntax.
(Get-AzStorageAccount -Name $stoAccountName -ResourceGroupName $resourceGroupName ).EnableHierarchicalNamespace
Validate storage account before upgrading #
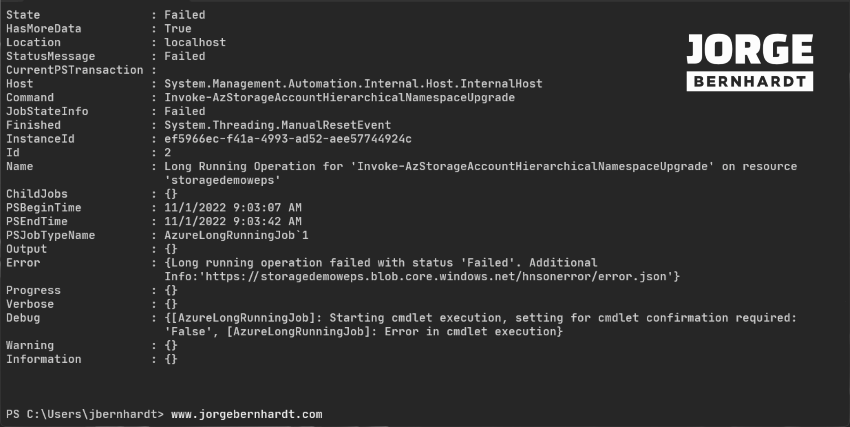
During the validation, the features incompatible with Azure Data Lake Storage Gen2 will be checked. At the end of this process, if an incompatibility or problem is found, an “error.json” report will be available as a blob in the container “hnsonerror.“To start the validation process, you should run the Invoke-AzStorageAccountHierarchicalNamespaceUpgrade cmdlet with the value “validation” in the parameter -RequestType.
$validationResult = Invoke-AzStorageAccountHierarchicalNamespaceUpgrade `
    -ResourceGroupName $resourceGroupName `
    -Name $stoAccountName `
    -RequestType Validation `
    -AsJob
$validationResult | Format-List -Property *

Upgrade Storage Account #
The upgrade process may take several hours to complete, and once completed, it cannot be reversed. Please note that the storage account will be offline during the upgrade process. To start the validation process, you should run the Invoke-AzStorageAccountHierarchicalNamespaceUpgrade cmdlet with the value “Upgrade” in the parameter -RequestType.
$upgradeTask = Invoke-AzStorageAccountHierarchicalNamespaceUpgrade `
    -ResourceGroupName $resourceGroupName `
    -Name $stoAccountName `
    -RequestType Upgrade `
    -Force `
    -AsJob
$upgradeTask | Wait-Job

Stop the upgrade process #
An upgrade in progress can be aborted by using the Stop-AzStorageAccountHierarchicalNamespaceUpgrade cmdlet with the following syntax.
Stop-AzStorageAccountHierarchicalNamespaceUpgrade `
    -ResourceGroupName $resourceGroupName `
    -Name $stoAccountName
Verify the changes made #
Finally, you should use the following command to verify that the change has been made correctly.
(Get-AzStorageAccount -Name $stoAccountName -ResourceGroupName $resourceGroupName ).EnableHierarchicalNamespace
Azure CLI Workaround #
In this case, we will use Azure Cloud Shell, a browser-based shell built into Azure Portal. This allows us to use the Azure command-line tools (Azure CLI and Azure PowerShell) directly from a browser. If you want to know more about Azure Cloud Shell, check out this link. First, we define the characteristics of our environment and store the values in variables.
resourceGroupName="RG-DEMO-WE"
stoAccountName="storagedemowe"
Get the current setting in your Azure storage account #
You should run the following command to verify that your storage account does not have this feature enabled.
az storage account show \
--name $stoAccountName \
--resource-group $resourceGroupName \
--query isHnsEnabled
Validate storage account before upgrading #
During validation, features that Azure Data Lake Storage Gen2 does not support will be checked. At the end of this process, if an incompatibility or issue is found, an “error.json” report will be available as a blob in the container “hnsonerror.” To start the validation process, you should run the following command.
az storage account hns-migration start \
--type validation \
-n $stoAccountName \
-g $resourceGroupName
Upgrade Storage Account #
The upgrade process can take several hours to complete, and once it is complete, it cannot be reversed. To start the upgrade task, you should run the following command. Please note that the storage account will be offline during the upgrade process.
az storage account hns-migration start \
--type upgrade \
-n $stoAccountName \
-g $resourceGroupName
Stop the upgrade process #
An upgrade task in progress can be canceled with the following command.
az storage account hns-migration stop \
-n $stoAccountName \
-g $resourceGroupName
Verify the changes made #
Finally, you should use the following command to verify that the change has been made correctly.
az storage account show \
--name $stoAccountName \
--resource-group $resourceGroupName \
--query isHnsEnabled

