How to create an Azure Virtual Desktop Host Pool
Hi everyone, after a month of dedicated full time to work and to the preparation of the renewals of my certifications, I’m back with the first post in a series of articles where I’ll try to explain how to implement Azure Virtual Desktop. This first article will show you how to create an Azure virtual desktop Host pool using PowerShell and Azure CLI.
The idea of this article is to create a host pool group with the essential characteristics and then, in the following posts, gradually include the different resources of the Azure virtual desktop services that interact with it. Therefore, in the creation of the host pool, I will only work with the following parameters:
- HoostPoolType: <Pooled|Personal>
- LoadBalancerType: <BreadthFirst|DepthFirst|Persistent>
- PreferredAppGroupType: <Desktop|RailApplications>
- StartVMOnConnect: <True|False>
- ValidationEnvironment: <True|False>
- MaxSessionLimit
Azure PowerShell Workaround #
First, you need to ensure the Az.DesktopVirtualization module is installed on your computer and imported into your Powershell session. To do that, you should use the following commands.
Install-Module Az.DesktopVirtualization
Import-Module Az.DesktopVirtualization
Once you’ve imported the module, you’re ready to go. The easiest way to get started is to log in interactively at the command line.
Connect-AzAccount
This cmdlet will bring up a dialog box prompting you for your email address and password associated with your Azure account. You can choose the default subscription if you have more than one associated with your mail account. To perform this task, we will use the following commands:
Get-AzSubscription
Select-AzSubscription -Subscription "My Subscription"
Once you set your default subscription, you’re ready to start.
Set the variables #
Here, we define the characteristics of our environment and the resource’s properties.
$resourceGroupName="RG-DEMO-WE"
$location="westeurope"
$hostPoolName="HP-DEMO-WE"
Create a new host pool #
To create a host pool, you should use the New-AzWvdHostPool cmdlet with the following syntax.
New-AzWvdHostPool `
    -ResourceGroupName $resourceGroupName `
    -Name $hostPoolName `
    -HostPoolType 'Pooled' `
    -LoadBalancerType 'BreadthFirst' `
    -Location $location `
    -PreferredAppGroupType 'Desktop' `
    -Description "My AVD host pool" `
    -FriendlyName "AVD DEMO" `
    -StartVMOnConnect:$true `
    -ValidationEnvironment:$false `
    -MaxSessionLimit '10' `
    -Tag @{Environment="www.jorgebernhardt.com"}
Update a host pool #
Once the resource is created, you can modify it using the Update-AzWvdHostPool cmdlet.
Update-AzWvdHostPool `
    -Name $hostPoolName `
    -ResourceGroupName $resourceGroupName `
    -ValidationEnvironment:$true
In this example, I will modify the properties of the host pool to use it as a validation host pool. Microsoft recommends creating a validation host pool to apply service updates first and then monitoring the service before applying updates to a production host pool.
Get the properties of a host pool #
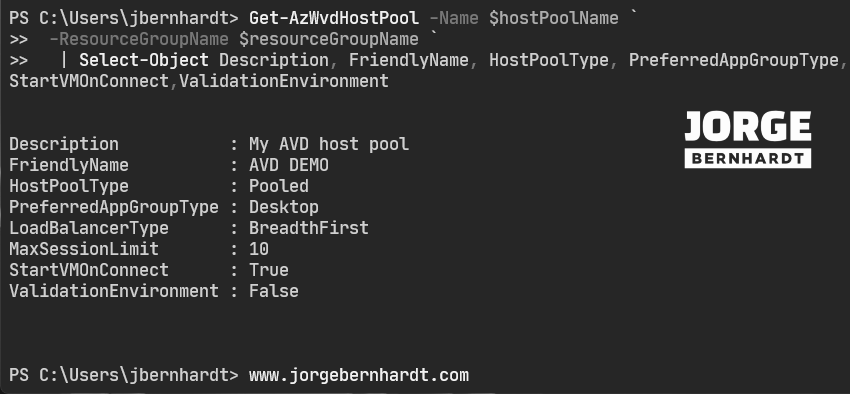
To list all the properties of a host pool, you should use the Get-AzWvdHostPool cmdlet with the following syntax.
Get-AzWvdHostPool -Name $hostPoolName `
    -ResourceGroupName $resourceGroupName `
    | Select-Object Description, FriendlyName, HostPoolType, PreferredAppGroupType, LoadBalancerType, MaxSessionLimit, StartVMOnConnect,ValidationEnvironment

Remove a host pool #
Finally, if you want to remove the host pool, you should use the Remove-AzWvdHostPool cmdlet with the following syntax.
Remove-AzWvdHostPool `
    -Name $hostPoolName `
    -ResourceGroupName $resourceGroupName
Azure CLI Workaround #
In this case, we will use Azure Cloud Shell, a browser-based shell built into Azure Portal. This allows us to use the Azure command-line tools (Azure CLI and Azure PowerShell) directly from a browser. If you want to know more about Azure Cloud Shell, check out this link. First, we define the characteristics of our environment and store the values in variables.
resourceGroupName="RG-DEMO-WE"
location="westeurope"
hostPoolName="HP-DEMO-WE"
Create a new host pool #
First, to create a host pool, you should use the following command.
az desktopvirtualization hostpool create \
--name $hostPoolName \
--resource-group $resourceGroupName \
--location $location \
--host-pool-type "Pooled" \
--load-balancer-type "BreadthFirst" \
--preferred-app-group-type "Desktop" \
--description "My AVD host pool" \
--friendly-name "AVD DEMO" \
--start-vm-on-connect true \
--validation-environment false \
--max-session-limit 10 \
--tags Environment="www.jorgebernhardt.com"
Update a host pool #
Once the resource is created, you can modify it using the following commands.
az desktopvirtualization hostpool update \
--name $hostPoolName \
--resource-group $resourceGroupName \
--validation-environment false
In this example, I will modify the properties of the host pool to use it as a validation host pool. Microsoft recommends creating a validation host pool to apply service updates first and then monitoring the service before applying updates to a production host pool.
Get the properties of a host pool #
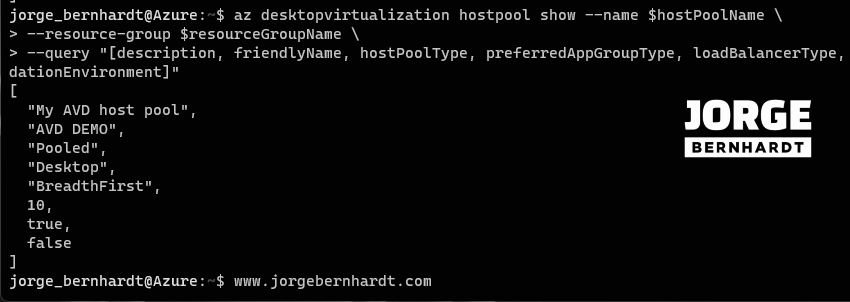
Use the following command to list all the properties of a host pool.
az desktopvirtualization hostpool show \
--name $hostPoolName \
--resource-group $resourceGroupName \
--query "[description, friendlyName, hostPoolType, preferredAppGroupType, loadBalancerType, maxSessionLimit, startVmOnConnect, validationEnvironment]"

Delete a host pool #
Finally, if you want to remove the host pool, you should use the following command.
az desktopvirtualization hostpool delete \
--name $hostPoolName \
--resource-group $resourceGroupName
Thanks for reading my post. I hope you find it helpful. In the next article, I’ll explain how to customize Remote Desktop Protocol (RDP) properties for a host pool. Check out this link if you want to know more about Azure Virtual Desktop.
