How to create and manage custom roles using Azure PowerShell
Sometimes it is necessary to create a new role to adjust it to our needs. Today, I want to show you how to create a custom role using Azure PowerShell with the JSON template. This tutorial assumes that you already have a Microsoft Azure account configured.
Azure PowerShell Workaround #
If you want to know how to install the PowerShell Azure module on your machine, check out this link. The simplest way to get started is to sign in interactively at the command line.
Login-AzAccount
This cmdlet will bring up a dialog box prompting you for your email address and password associated with your Azure account. If you have more than one subscription associated with your mail account, you can choose the default subscription. To perform this task we will use the following commands:
Get-AzSubscription
Select-AzSubscription -Subscription "My Subscription"
Create a custom role #
In my case, I will create a custom role that allows starting a virtual machine in my subscription. First, I will create a JSON template as the source definition for the custom role. The Id should be set to null on the initial role created, as a new ID is generated automatically.
{
  "Name": "Virtual Machine Starter",
  "Id": null,
  "IsCustom": true,
  "Description": "The users of this role can start virtual machines",
  "Actions": [
    "Microsoft.Compute/*/read",
    "Microsoft.Network/*/read",
    "Microsoft.Storage/*/read",
    "Microsoft.Compute/virtualMachines/start/action",
    "Microsoft.Authorization/*/read",
    "Microsoft.Resources/subscriptions/resourceGroups/read",
    "Microsoft.Insights/alertRules/*"
  ],
  "NotActions": [
  ],
  "AssignableScopes": [
    "/subscriptions/4fc9f7a3-0000-0000-0000-56ea753958b4"
  ]
}
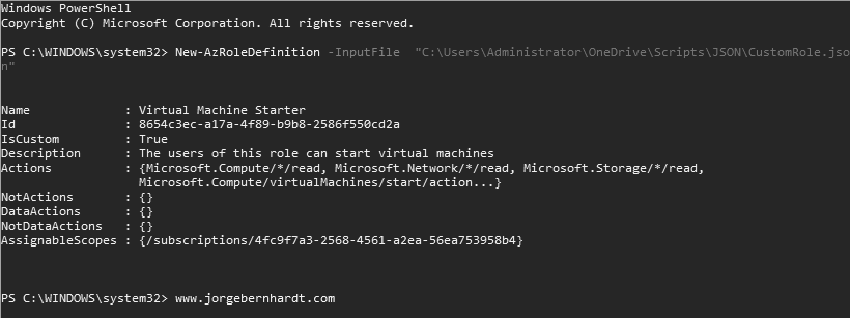
To add the role to your subscription, you should use the New-AzRoleDefinition cmdlet with the following syntax:
New-AzureRmRoleDefinition -InputFile <String>
Verify the creation of a custom role #
To List all Azure RBAC custom roles, use the Get-AzRoleDefinition cmdlet with the -Custom parameter.
Get-AzRoleDefinition -Custom
Update a custom role #
First, you must obtain the custom role definition and then modify the JSON file. To perform this task, use the Get-AzRoleDefinition cmdlet with the following syntax:
Get-AzRoleDefinition `
  -Name <String> `
  | ConvertTo-Json `
  | Out-File -FilePath <String>
Once the changes are made to the JSON file, you must use the Set-AzRoleDefinition cmdlet with the following syntax:
Set-AzRoleDefinition -InputFile <String>
Delete a custom role #
If you no longer need the role and want to delete it, use the Remove-AzRoleDefinition cmdlet with the following syntax:
Get-AzRoleDefinition `
  -Name <String> `
  | Remove-AzRoleDefinition `
  -Force
If you want to know more about custom roles in Azure, check out this link.


