How to configure Microsoft 365 Groups naming policy in Azure Active Directory
Today, I want to show you how to configure and apply Microsoft 365 group naming policy in your Azure Active Directory using Powershell. The naming policy applies to creating and editing groups created in Outlook, Microsoft Teams, SharePoint, Exchange, or Planner workloads. Using the naming policy allows you to apply consistent names for Microsoft 365 groups and block the use of specific words in group names and aliases.
Requirements #
To configure the naming policy, you should have one of the following roles:
- Global Administrator.
- Group Administrator.
- Directory Writer.
**Important: **When the group naming policy is configured, the policy will be applied to new Microsoft 365 groups created by end users. The naming policy does not apply to the following administrator roles:
- Global Administrator.
- User Administrator.
PowerShell Workaround #
First, you must ensure the AzureADPreview module is installed on your computer and then imported into your Powershell session. To do that, you should use the following commands.
Install-Module AzureADPreview
Import-Module AzureADPreview
Once you have imported the module, you are ready to start.
Connect to Azure Active Directory. #
The easiest way to get started is to log in interactively at the command line.
Connect-AzureAD
Check the configuration at the directory level #
You can check with the following command if you already have a directory-level configuration set.
Get-AzureADDirectorySetting `
    | ? { $_.DisplayName -eq "Group.Unified"}
Check out this link if you don’t have a directory-level configuration set*.*
Set the naming policy #
Get the current directory settings and store it in a $settings object using the Get-AzureADDirectorySetting cmdlet with the following syntax.
$Setting = Get-AzureADDirectorySetting `
    -Id (Get-AzureADDirectorySetting `
    | where -Property DisplayName -Value "Group.Unified" -EQ).id
Set the name prefixes and suffixes in the “PrefixSuffixNamingRequirement” property in the $settings object.
$Setting["PrefixSuffixNamingRequirement"] =“GRP_[GroupName]_[Department]_[StateOrProvince]"
Important:
- For the feature to work correctly, [Group Name] must be included in the configured settings.
- Supported Azure AD attributes are: [Department], [Company], [Office], [StateOrProvince], [CountryOrRegion], [Title].
- Extension attributes and custom attributes aren’t supported.
- The prefixes or suffixes can be fixed strings or user attributes that are added when the user creates the group.
- The total number of characters allowed is 63 characters.
Finally, use the Set-AzureADDirectorySetting cmdlet to update directory settings in Azure Active Directory.
Set-AzureADDirectorySetting `
    -Id (Get-AzureADDirectorySetting `
    | where -Property DisplayName `
    -Value "Group.Unified" -EQ).id `
    -DirectorySetting $Setting
Set the custom-blocked words #
Get the current directory settings and store it in a $settings object using the Get-AzureADDirectorySetting cmdlet with the following syntax.
$Setting = Get-AzureADDirectorySetting `
    -Id (Get-AzureADDirectorySetting `
    | where -Property DisplayName `
    -Value "Group.Unified" -EQ).id
Set the comma-separated list of words you want to block in the “CustomBlockedWordsList” property in the $settings object.
$Setting\["CustomBlockedWordsList"\]=“My,Test,Temp"
Important:
- Blocked words are not case-sensitive.
- There are no character restrictions on blocked words.
- The total number of blocked phrases in the blocked word list is 5.000.
Finally, use the Set-AzureADDirectorySetting cmdlet to update directory settings in Azure Active Directory.
Set-AzureADDirectorySetting `
    -Id (Get-AzureADDirectorySetting `
    | where -Property DisplayName `
    -Value "Group.Unified" -EQ).id `
    -DirectorySetting $Setting
Check the changes made to the directory settings #
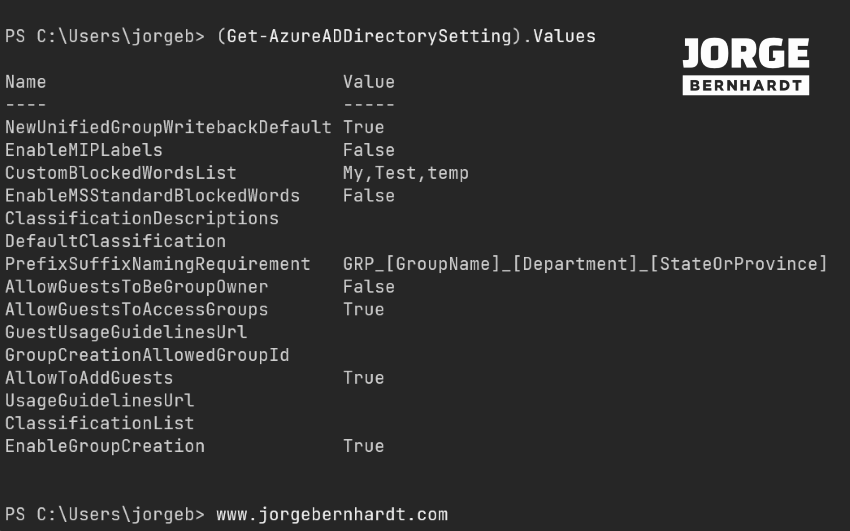
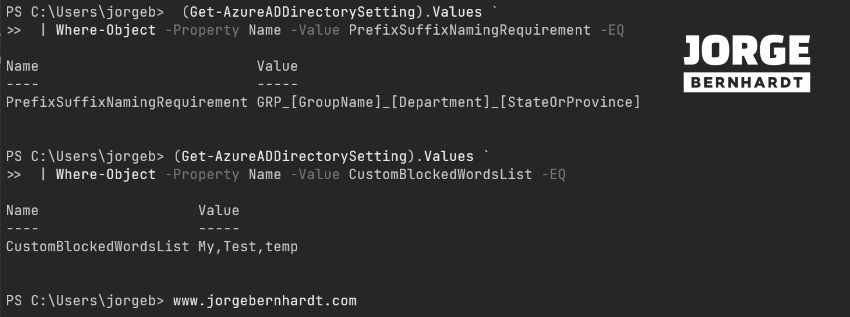
To verify the changes made, you have different options. The first option is to use the Get-AzureADDirectorySetting cmdlet with the following syntax to get all the current settings.
(Get-AzureADDirectorySetting).Values

(Get-AzureADDirectorySetting).Values | Where-Object -Property Name -Value PrefixSuffixNamingRequirement -EQ
(Get-AzureADDirectorySetting).Values | Where-Object -Property Name -Value CustomBlockedWordsList -EQ

Remove the naming policy and the custom-blocked words #
If you want to remove the naming policy, you should empty the “PrefixSuffixNamingRequirement” and “CustomBlockedWordsList” settings and then use the Set-AzureADDirectorySetting cmdlet with the following syntax.
$Setting["PrefixSuffixNamingRequirement"] =""
$Setting["CustomBlockedWordsList"]=""

Set-AzureADDirectorySetting `
    -Id (Get-AzureADDirectorySetting `
    | where -Property DisplayName -Value "Group.Unified" -EQ).id `
    -DirectorySetting $Setting
Azure Active Directory Admin Center #
If you prefer to use the Azure AD admin center: log in to the admin center with your global administrator account, select Azure AD, and choose Groups. Under the Settings section, select Naming policy.
- On the Naming policy page, select group naming policy. You can view or edit the current prefix or suffix naming policies individually.
- On the Naming policy page, select Blocked words. You can view or edit the current list of blocked custom words. New words must be added to existing entries in a file in .csv format.
Thanks for reading my post. I hope you find it helpful. If you want to learn more about the naming policy for groups in Azure Active Directory, check out this link.
