How to Enable Group Policy Loopback Processing
In this post, I want to show you how to use Group Policy Loopback processing to assign user policies to computer objects. As we know, A user GPO is applied to an organizational unit (OU) that contains users, and a computer GPO is applied to a UO that contains computers. This has no effect if we link a GPO of users to a UO with Computers.
Prerequisites #
- Create a GPO and link them to the OU that contains your computer’s object.
Procedure #
-
Open the Group Policy Microsoft Management Console (MMC) on your Active Directory server.
-
In the left pane, right-click the GPO you created for the group policy settings and select Edit. The Group Policy Object Editor window appears.
-
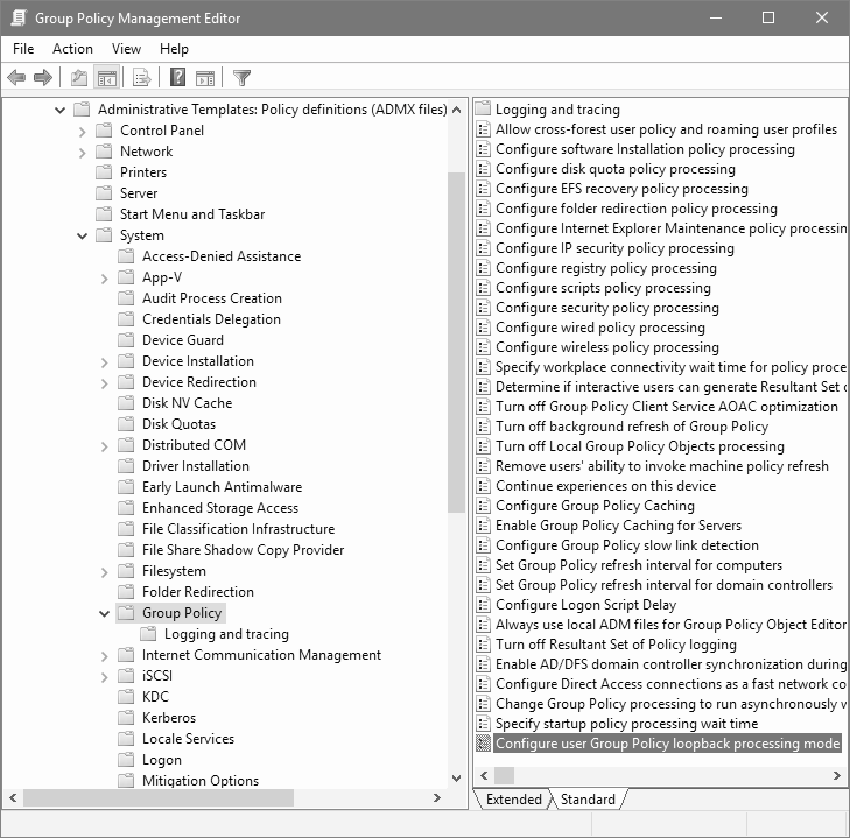
Navigate to Computer Configuration, Policies, Administrative Templates, System, and Group Policy folders in the left pane.

-
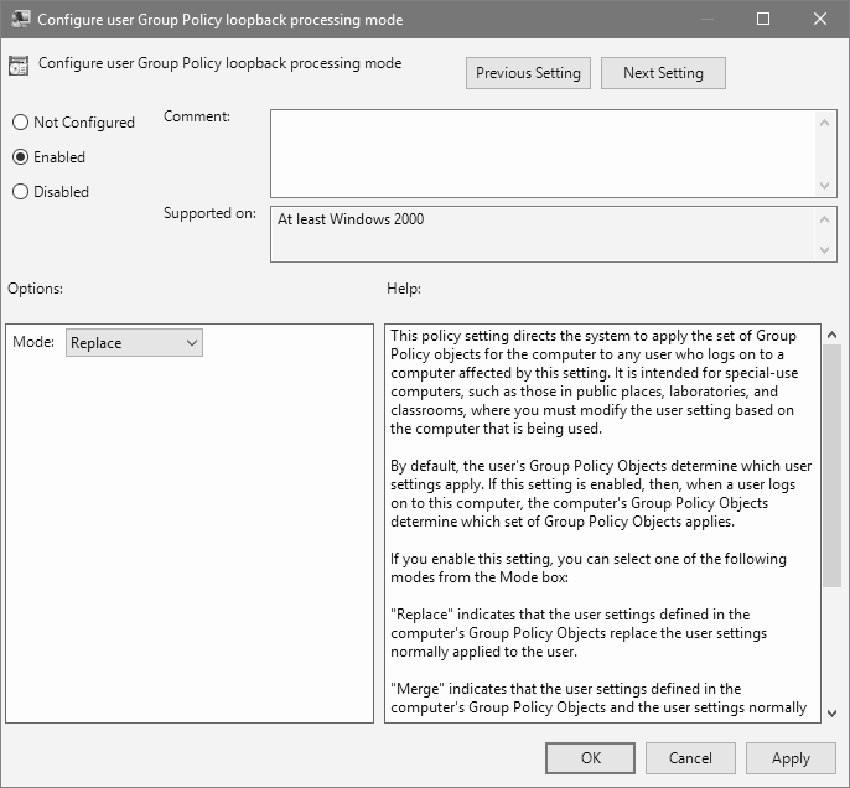
Double-click “Configure user Group Policy loopback processing mode” and set it to Enabled.

-
After you enable the setting, you have two modes to choose from:
Replace In this mode, The user policy setting defined in the computer’s GPO replaces the user settings normally applied to the user.
Merge In this mode, The user policy settings defined in the computer’s GPO and user settings normally applied to the user are combined. If the settings conflict, the user settings in the Computers GPO take precedence over the user’s standard settings.
Thanks for reading my post. I hope you find it useful.
If you want to know more about Group Policy Loopback Processing, check out this link.
