Azure managed disks have a long list of benefits that make them the ideal choice to use with your virtual machines. One of those benefits is the ability to take snapshots of your virtual disks. This post will show you how to take snapshots of your managed disks and how to create a VM using these snapshots. Requirements:
This tutorial assumes that you already have a Microsoft Azure account set up.
You have an existing virtual machine that uses managed disks. If you want to know how to convert Azure VM to use Managed Disks, see this link.
Important: Snapshots are billed based on the used size.
If you want to know how to install the PowerShell Azure module on your machine, check out this
link. The simplest way to get started is to sign in interactively at the command line.
Connect-AzAccount
This cmdlet will bring up a dialog box prompting you for your email address and password associated with your Azure account. If you have more than one subscription associated with your mail account, you can choose the default subscription. To perform this task, we will use the following commands:
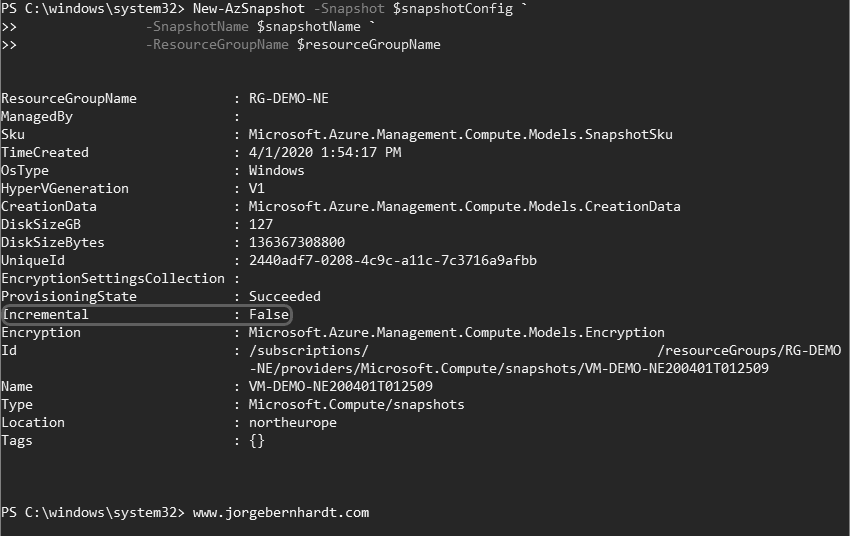
To take a snapshot, you should use the New-AzSnapshot cmdlet with the following syntax. In the following example, I set the name of the snapshots by adding the date to the name of the VM, but you can choose the name you want for your snapshots.,
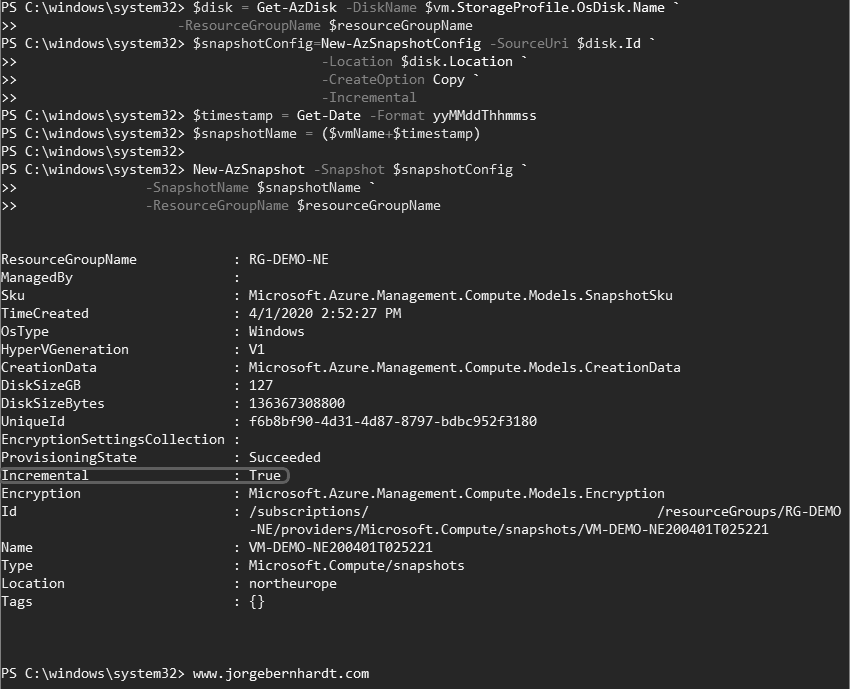
Microsoft has recently released the ability to take incremental snapshots of your managed disks. These types of snapshots include only all changes since the last snapshot. To use this type of snapshot follow the next steps. You must first get the disk you have snapshots of and want to take an incremental snapshot. To do this, you should use the cmdlet with the following syntax.
Unlike regular snapshots, these snapshots are always stored on standard HDDs, regardless of the type of storage on the primary disks. Also, for increased reliability, they are stored in Zone Redundant Storage (ZRS) by default in regions that support ZRS.
To take a snapshot, you should use the New-AzSnapshot cmdlet with the following syntax. In the following example, I set the name of the snapshots by adding the date to the name of the VM, but you can choose the name you want for your snapshots.
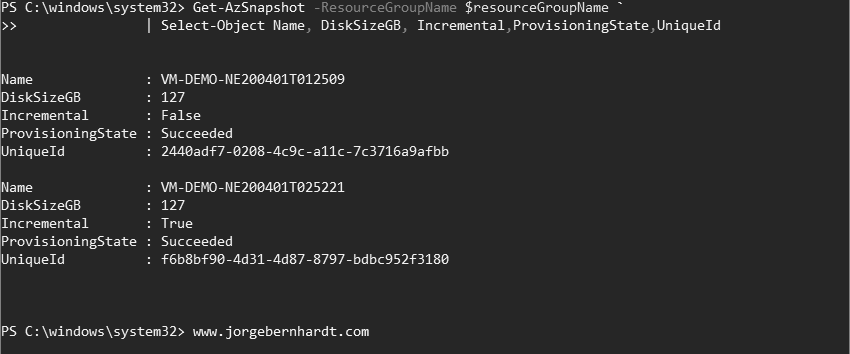
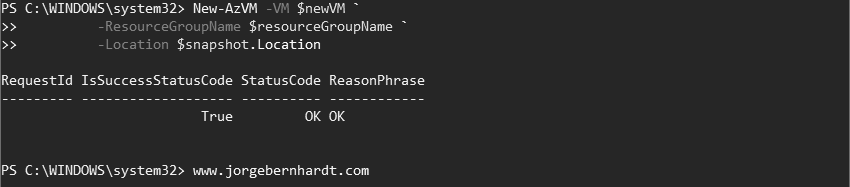
Here I will show you how to create a virtual machine from an existing snapshot taken from an OS disk. Use the Get-AzSnapshot cmdlet to list all available snapshots within the resource group is obtained.
We use the Resource ID of the newly managed disk to attach it to the virtual machine. In the last parameter, you can change the operating system to Linux if the operating system disk has Linux OS
Another possibility to access the data stored in the snapshots is to convert the snapshots to virtual hard disks and then mount them as data disks in another VM.
Thanks for reading my post. I hope you find it helpful.
If you want to know more about Azure Managed Disks, check out this
link.